There are many comprehensive solutions available that allow implementing additional protection for your service, website, or administration panel. I will tell you about one of the simplest and most effective methods – using CloudFlare Zero Trust. In just a couple of mouse clicks, you can enhance the security of your resource without additional settings from the website or server side.
What do you need?
To implement this method, you need to connect your domain name to CloudFlare, and I believe you won’t encounter any issues with that.
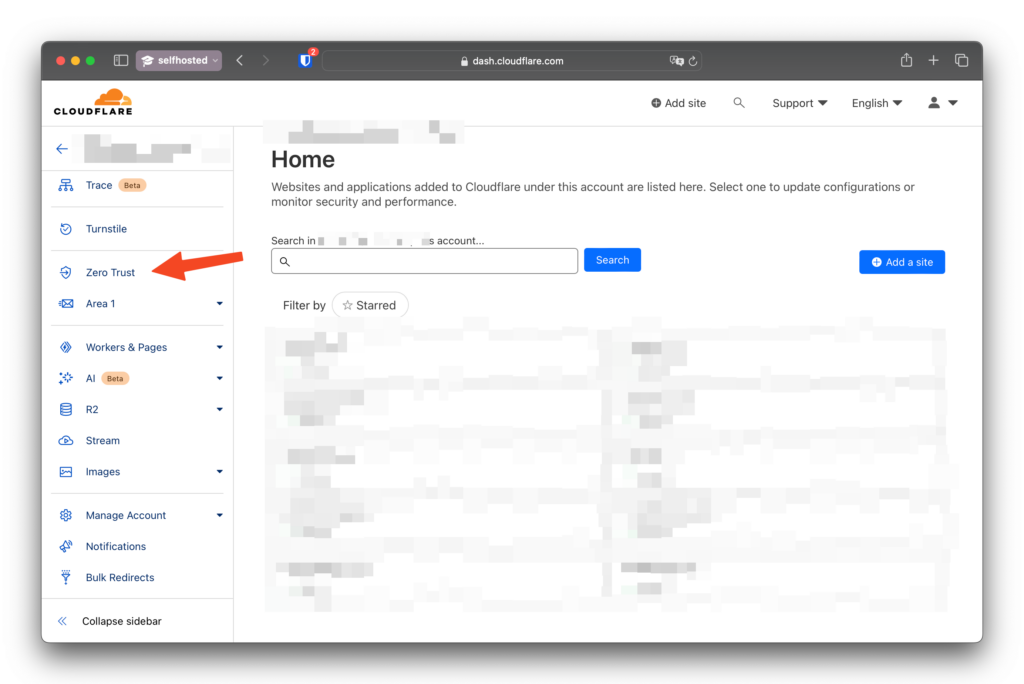
Log in to your CloudFlare account and navigate to the Zero Trust section.
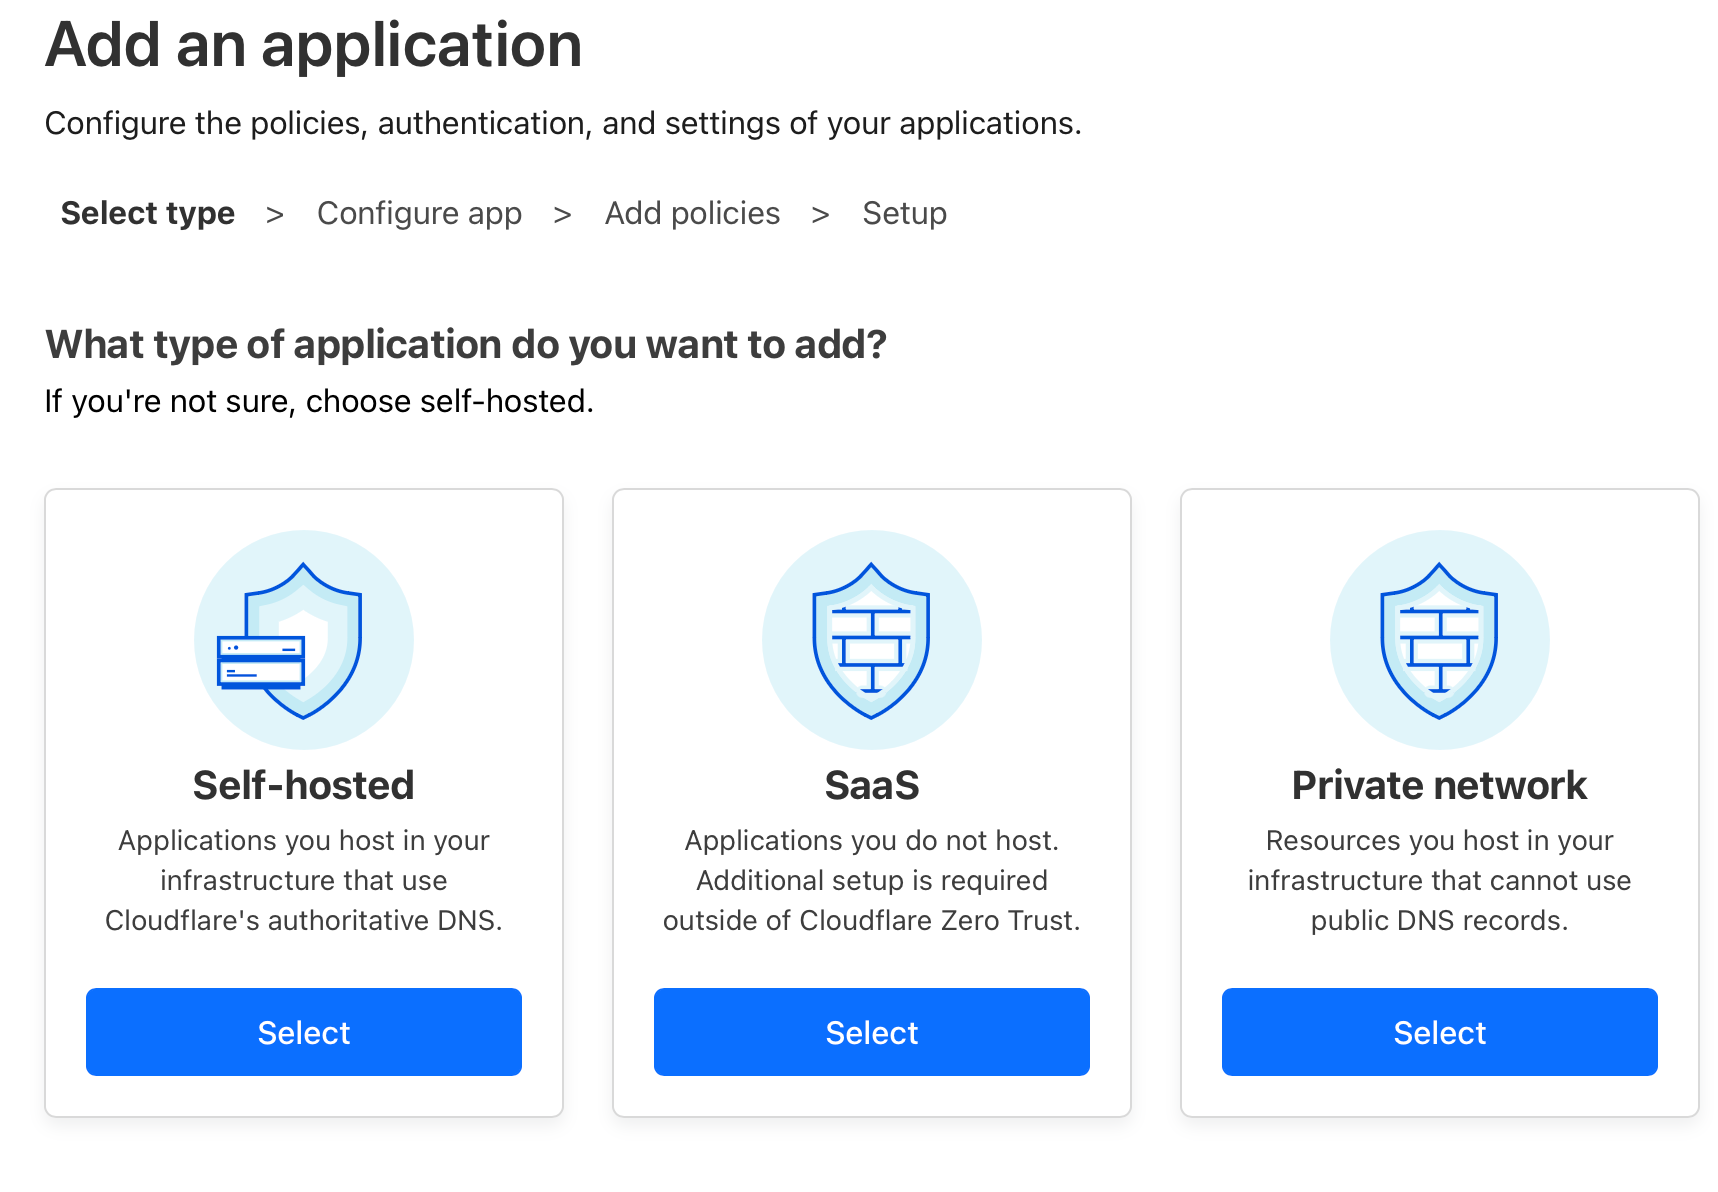
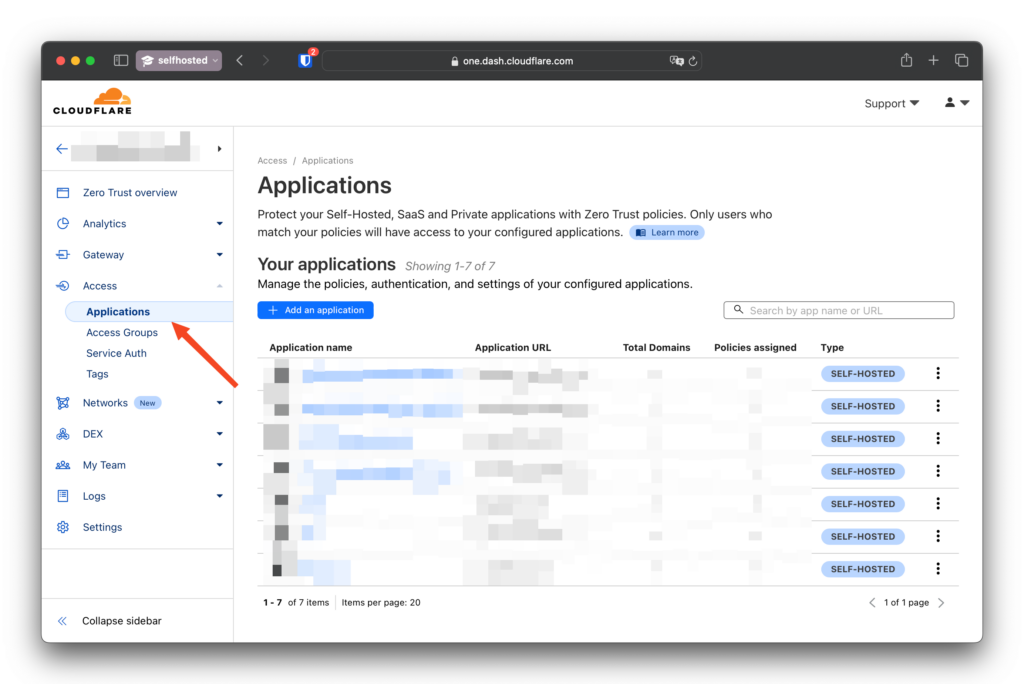
Next, navigate to Access — Application and add a new application by clicking on ‘Add an application.’
At the next stage, specify that our application will be Self-Hosted.

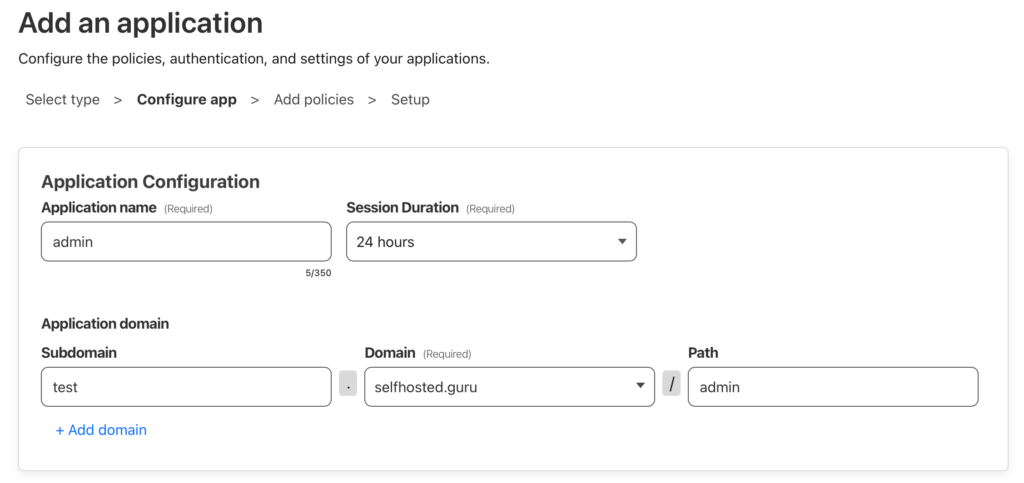
Fill in the following fields:
- Application name: the name for your application as you will see it in the list of all applications.
- Session Duration: the duration before the authorization session expires.
- Subdomain Domain Path: specify the subdomain, address, or a separate page that needs protection.
At this same step, there are other settings available that you can additionally modify as per your preference. Click ‘Next’ to proceed to the next step.
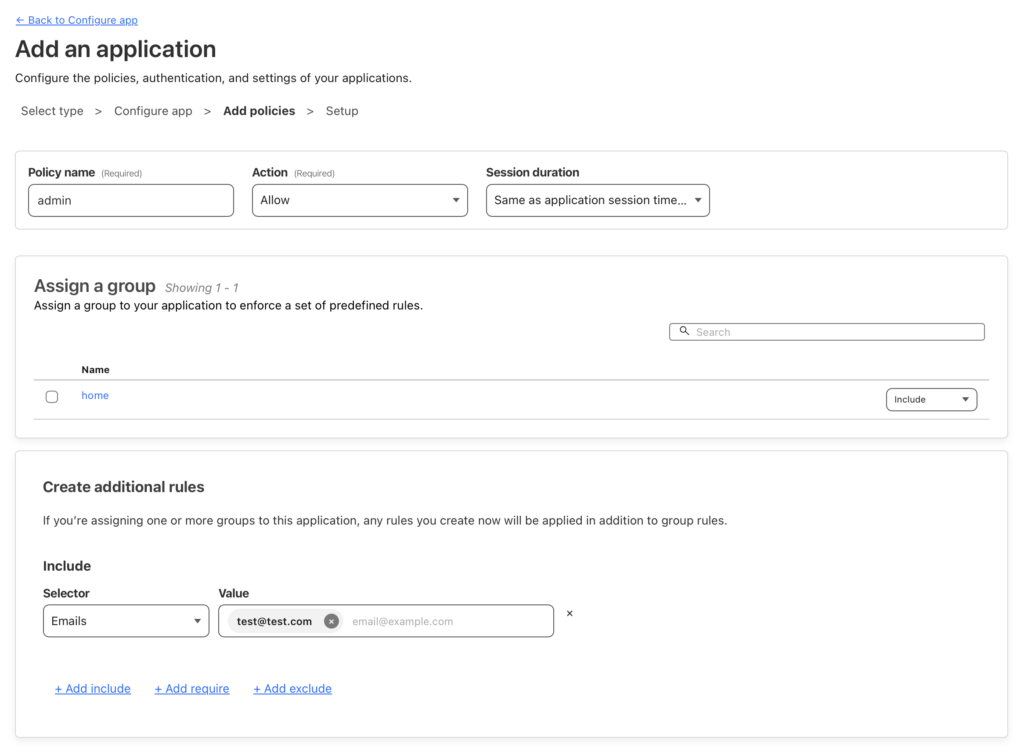
Specify the name of the security policy; in my example, the security policy name is ‘admin.’ In the ‘Create additional rules’ section, you can choose the access verification type that suits you the most. The simplest option is email verification. In this case, when accessing the specified page, subdomain, or site, there will be a request to enter an email. If the email is entered correctly, you will receive a one-time code for login. If the email is entered incorrectly, there will still be a request to enter a one-time password, but it will not be sent anywhere, and accessing the resource will be impossible.
On the next step, we do not enter anything; instead, we simply click ‘Add application.’ In the list of applications, you will see the application that we just created.

Now, if we try to navigate to the URL specified for the application, we will see the following page.
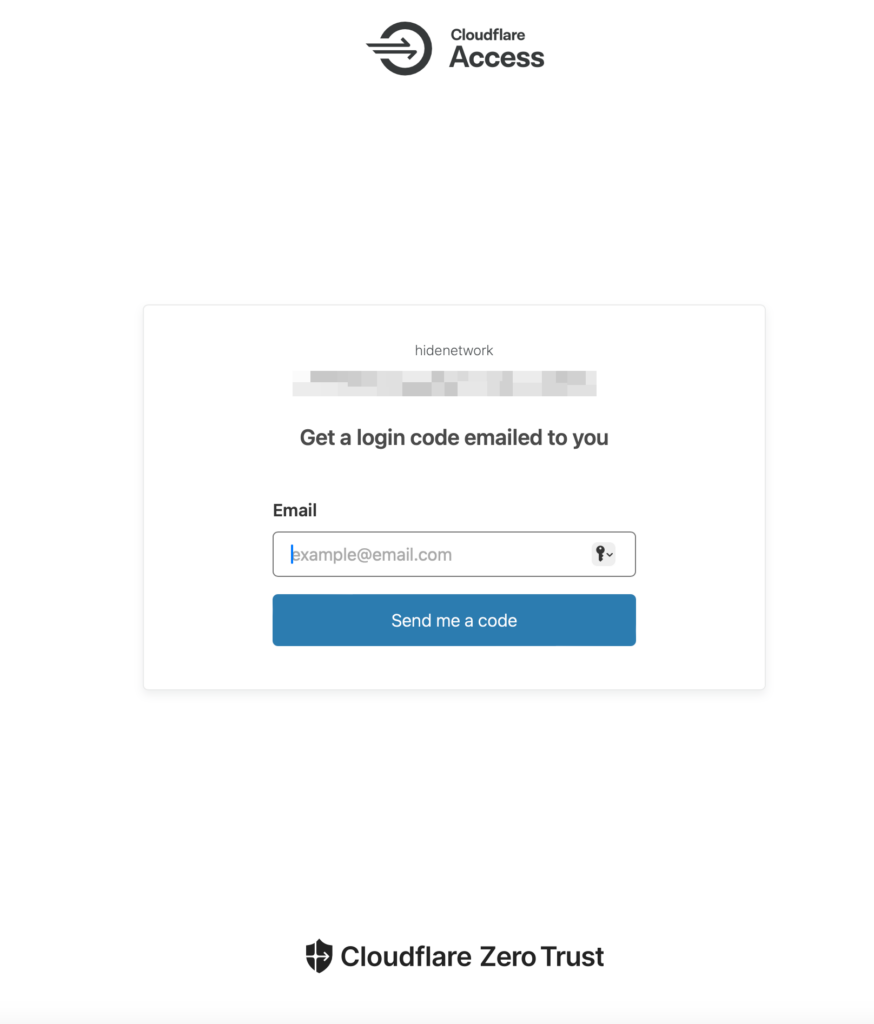
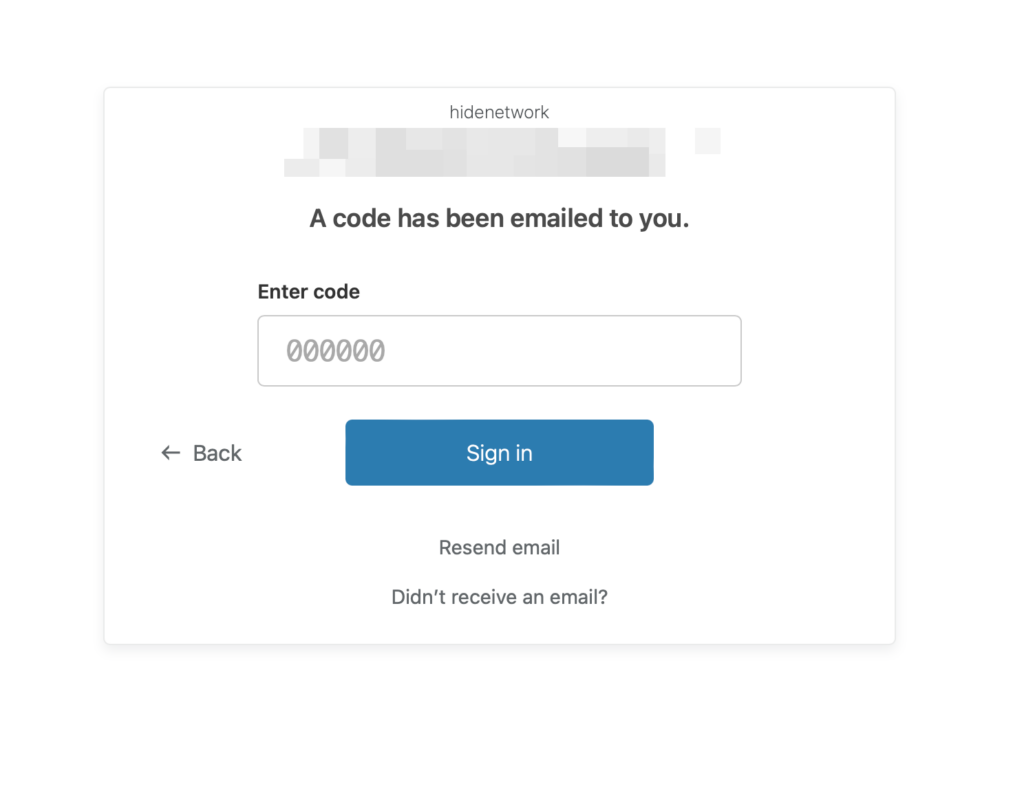
Enter the email that was specified as allowed and click ‘Send me a code.’ After that, you will be directed to the page to enter the one-time password.
You will receive an email that looks something like the following:
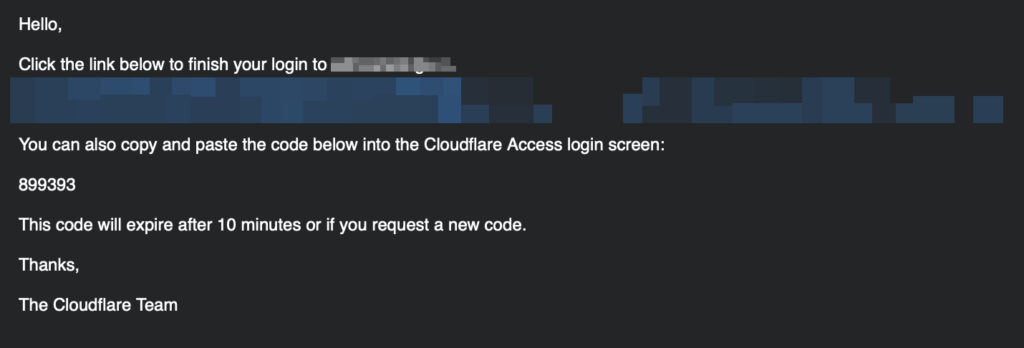
After entering the one-time code or following the link, you will access the resource that was under additional protection.
Advantages:
- Ease of setup
- A variety of user verification options before granting access to the resource
- No need to make changes on the website or service side.